- Brass Rod
- Red and Green LED's
- Red and Black wiring (2 meters long)
- 2 resistors
- Red and Black alligator clips
- 7 mm plastic tubing
- 2.4 mm Black shrink tubing
- 6.4 mm Red shrink tubing
- 12.7 mm Black shrink tubing
Firstly, you have to cut the ends of the red and black wire casing off to expose the wires inside (Refer to picture 3). After that you need to solder the resistors to the wires and then solder the LED's to them. Secondly, you have to insulate the brass rod with the 2.4 mm Black shrink tubing. Leave a gap in the middle for the LED's to be soldered onto the brass rod. Once you've done that, you solder the LED's onto the brass rod. Next, you wrap the red and black wires together so it will be easy to fit the 7mm plastic tubing, the 6.4 mm Red shrink tubing and the 12.7 mm Black shrink tubing on over it. Then, to make it look nice at the end you place the 7 mm plastic tubing over the brass rod and up to the LED's. To keep this in place you heat shrink the red and black tubing on.
 |
| This is an example of a finished Test Light |
 |
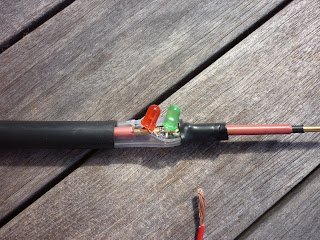
| This is a close up picture of LED's |
 |
| This is a close up of the ends of the wire casing cut off to expose the wires inside |

No comments:
Post a Comment